

Ever wanted to turn your bath into a spa experience without spending a lot? Making your own bath bombs is the answer! These fizzy treats can make your bath time feel like a special moment of relaxation and self-care.
Making your own bath bombs is surprisingly easy. You just need a few simple ingredients and some creativity. It’s a great way to save money, avoid harsh chemicals, or just have fun making something special for yourself.
This guide will show you how to make bath bombs step by step. You’ll learn about the science behind the fizz and how to make them perfectly. Soon, you’ll be able to turn your bathroom into your own spa!
Key Takeaways
- Bath bombs are simple to make at home with basic ingredients
- You can customize scents, colors, and shapes easily
- Homemade bath bombs are cost-effective and chemical-free
- Perfect for gifts or personal relaxation
- Suitable for crafters of all skill levels
Understanding the Science Behind Bath Bombs
Bath bombs are more than just colorful spheres of relaxation. They’re a fascinating chemical reaction waiting to happen in your bathtub. The magic of citric acid bath bombs lies in the simple yet exciting interaction between carefully selected natural bath bomb ingredients.
At the heart of every bath bomb is a remarkable scientific process. It transforms your ordinary bath into a spectacular sensory experience. The two key players in this fizzy performance are baking soda and citric acid.
The Chemistry of Fizz
When your bath bomb touches water, it triggers an incredible chemical reaction. Here’s what happens:
- Baking soda (sodium bicarbonate) acts as an alkali
- Citric acid provides the acidic component
- Water initiates the neutralization reaction
This interaction creates carbon dioxide gas. It produces the delightful bubbling and fizzing effect you love. It’s similar to the classic volcano experiment you might remember from science class, but far more relaxing!
Modulating Ingredients: The Unsung Heroes
Natural bath bomb ingredients do more than just create fizz. Cornstarch plays a crucial role in controlling the reaction speed. Without it, your bath bomb might explode into bubbles instantly instead of providing a sustained, enjoyable experience.
Binding agents like oils and witch hazel help hold everything together. They ensure your bath bomb maintains its shape and releases its magic slowly when it hits the water. Understanding these ingredients allows you to craft the perfect bath bomb every time.
Essential Ingredients and Supplies You’ll Need
Making your own essential oil bath bombs and moisturizing bath bombs is a fun DIY project. You’ll need to gather all the ingredients and supplies first. This will help you create the perfect bath experience.

Here are the main ingredients you’ll need for stunning bath bombs at home:
- Dry Ingredients:
- 1 cup baking soda
- 1/2 cup citric acid
- 1/2 cup Epsom salt (optional)
- 1/2 cup cornstarch
- Wet Ingredients:
- 2-2.5 tablespoons carrier oil (almond, coconut, or olive oil)
- 3/4 tablespoon witch hazel
- 12-15 drops essential oils
- A few drops of liquid food coloring
You can find most ingredients at local grocery stores or pharmacies. Citric acid is in the canning section of stores like Walmart or Target. Online retailers like Amazon have specialized ingredients too.
“The right ingredients transform a simple bath into a luxurious self-care experience.”
For molding your bath bombs, you have several options:
- Specialized bath bomb molds ($10-20 online)
- Silicone cupcake cases
- Muffin tins
- Plastic cookie cutters
Expect to spend about $25-35 for the initial supplies. This will let you make many bath bombs, saving money compared to buying them.
Pro tip: Pick carrier oils wisely for your bath bombs. Almond oil and coconut oil are great for skin, making you feel soft and refreshed.
How to Make Your Own Bath Bombs
Making your own bath bombs is a fun DIY project. It lets you customize your bath time. With just a few ingredients and patience, you can make perfect bath bombs at home.
First, get all your supplies ready. Make sure your workspace is clean and dry. The key to making great bath bombs is to mix everything carefully.
Mixing Your Dry Ingredients
Start by mixing your dry ingredients in a big bowl. Here’s a simple recipe for your bath bomb base:
- 1 cup baking soda
- 1/2 cup citric acid
- 1/2 cup Epsom salt
- 1/2 cup cornstarch
Whisk the ingredients well to mix them evenly. Pro tip: Sift them if they’re clumpy to get a smoother mix.
Combining Wet and Dry Components
This step needs a gentle touch, especially when using molds. Mix your wet ingredients in a small bowl:
- 2-2.5 tablespoons carrier oil
- 12-15 drops essential oil
- A few drops of liquid food coloring
Add the wet mix to the dry ingredients slowly. Use a spray bottle for better control. Mix gently to avoid fizzing too early.
Molding and Shaping Your Bath Bombs
Get your molds ready by following these steps:
- Pack the mixture tightly into molds
- Press down firmly and smooth the top
- For sphere molds, overfill each half
- Press halves together and secure
Let the bath bombs sit in molds for 2-4 hours. Then, remove them and let them dry for 24-48 hours before using.
| Ingredient | Quantity | Purpose |
|---|---|---|
| Baking Soda | 1 cup | Creates fizzing effect |
| Citric Acid | 1/2 cup | Triggers chemical reaction |
| Epsom Salt | 1/2 cup | Adds mineral benefits |
| Cornstarch | 1/2 cup | Helps bind ingredients |
With practice, you’ll get better at making beautiful bath bombs. They’ll make your bath time feel luxurious.
Creative Customization Ideas for Your Bath Bombs
Turn your homemade spa products into something special with personalized essential oil bath bombs. These bath bombs can show off your unique style and mood. You can make bath time just right for you.
Choosing Essential Oils for Different Moods
Essential oils are key to your bath bomb’s magic. Here’s how to pick the best scents:
- Lavender: Calming and stress-relieving
- Eucalyptus: Helps with breathing and boosts energy
- Chamomile: Helps you relax and sleep better
- Citrus: Makes you feel uplifted and energized
- Peppermint: Improves mental focus
Tip: Use 12-15 drops of essential oils per batch. Too many drops can mess up your bath bombs.
Adding Natural Colors and Decorative Elements
Make your essential oil bath bombs stand out with natural colors and decorations:
| Natural Color | Source | Result |
|---|---|---|
| Yellow | Turmeric | Sunny golden hue |
| Pink | Beetroot Powder | Soft rose color |
| Green | Spirulina | Earthy sage tone |
Decorative ideas include:
- Dried flower petals
- Biodegradable glitter
- Dried herbs
- Citrus peels
Be creative and try different mixes for a luxurious bath time experience!
Troubleshooting Common Bath Bomb Problems
Making perfect bath bombs is a skill that takes time to master. Even seasoned crafters face issues. Knowing how to fix problems with bath bomb molds and ingredients can make your bath bombs look amazing every time.
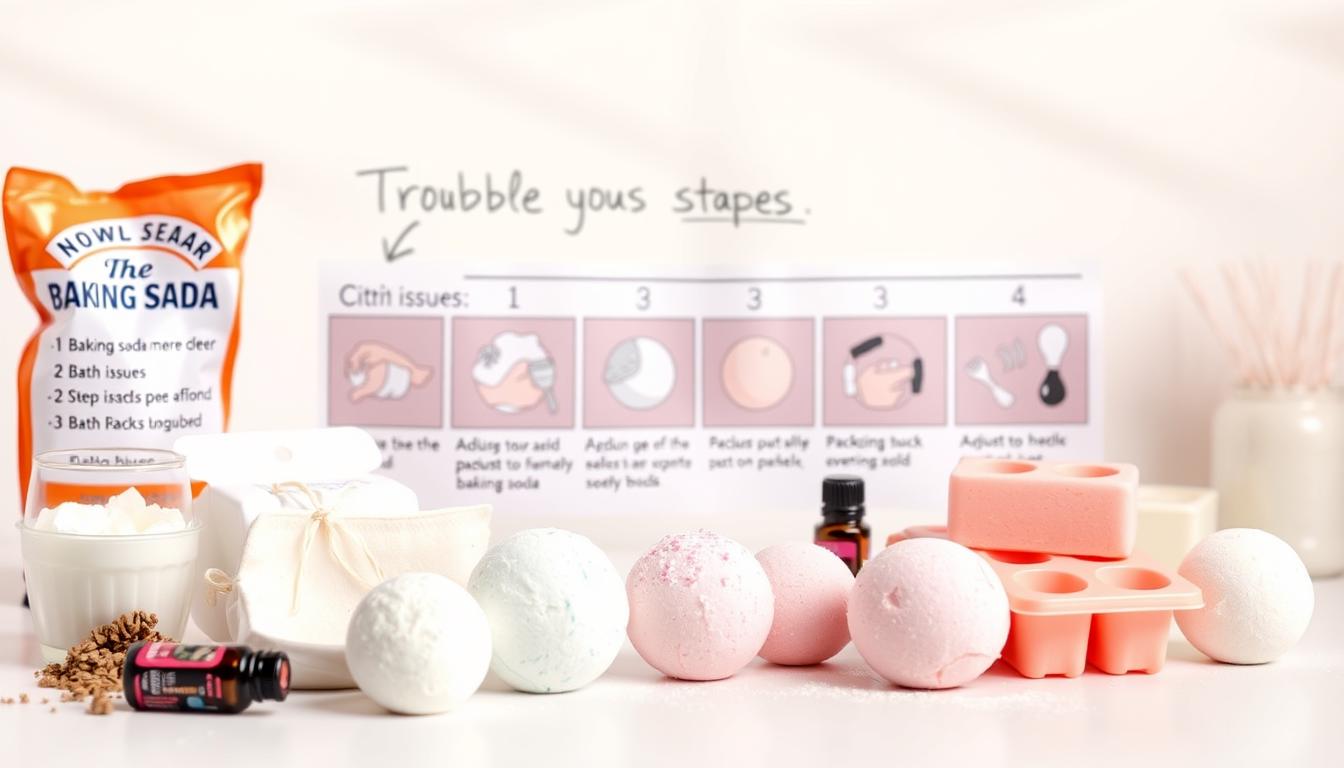
- Crumbling Bath Bombs: If your bath bombs crumble, they’re probably too dry. Slowly add liquid with a spray bottle, starting with just a little. Witch hazel is a good choice in humid places because it dries fast.
- Expanding or Cracking: Too much moisture can make bath bombs crack. Cut down on liquid, work in a cool spot, and add more cornstarch to soak up moisture.
- Premature Fizzing: Bath bombs fizzing too early means you’re adding too much wet stuff too fast. Use a spray bottle to control moisture and mix well all the time.
It’s important to dry and store your bath bombs right. Let them dry for 48 hours in a cool, dry place. Store them in airtight containers with silica packets to keep moisture out. If they stick in molds, wait longer before taking them out or use flexible silicone molds.
Quality of ingredients is key. Use fresh citric acid and keep the baking soda to citric acid ratio at 2:1 for a great fizz. Even if a batch doesn’t work out, you can crumble it and use it as fragrant bath salts!
Conclusion
You’ve now learned how to make amazing homemade spa products in your kitchen. Making bath bombs is a fun and rewarding craft. It turns simple ingredients into luxurious personal care items.
Your skills in making bath bombs will save you money. You’ll also have control over what touches your skin. This is a big plus.
The journey of making bath bombs is all about exploring and being creative. Every batch you make teaches you something new. Even if your first batch isn’t perfect, you’re learning a new skill.
Remember, even professional bath bomb makers started where you are now. They learned and experimented just like you.
Storing your homemade bath bombs is important. Keep them in airtight containers to keep them fresh for up to six months. Don’t worry if they’re a bit imperfect.
Cracked or crumbly bombs can be turned into fragrant bath salts. Your skills open up a world of personalized self-care. You can also give these products as gifts.
Your DIY bath fizzy recipe adventure is just starting. Enjoy the process, be creative, and have fun. Your bathroom is about to become your own spa sanctuary!
75 Responses
I am no longer positive where you are getting your info, but great topic. I needs to spend some time finding out more or understanding more. Thanks for wonderful info I used to be looking for this info for my mission.
Dead composed written content, Really enjoyed studying.
I was recommended this web site by my cousin. I am not sure whether this post is written by him as nobody else know such detailed about my trouble. You are incredible! Thanks!
Some genuinely excellent articles on this site, appreciate it for contribution. “An alcoholic is someone you don’t like who drinks as much as you do.” by Dylan Thomas.
Very interesting points you have mentioned, thanks for posting.
It’s a shame you don’t have a donate button! I’d most certainly donate to this fantastic blog! I suppose for now i’ll settle for book-marking and adding your RSS feed to my Google account. I look forward to brand new updates and will share this blog with my Facebook group. Chat soon!
I simply couldn’t leave your site prior to suggesting that I extremely loved the usual info an individual provide for your visitors? Is going to be again frequently to check up on new posts
I loved as much as you will receive carried out right here. The sketch is attractive, your authored subject matter stylish. nonetheless, you command get bought an edginess over that you wish be delivering the following. unwell unquestionably come more formerly again since exactly the same nearly very often inside case you shield this hike.
Loving the information on this internet site, you have done outstanding job on the content.
Hi my family member! I wish to say that this article is amazing, nice written and come with almost all significant infos. I would like to peer extra posts like this .
I’d have to examine with you here. Which is not something I often do! I get pleasure from reading a submit that can make folks think. Also, thanks for permitting me to remark!
Greetings! This is my first visit to your blog! We are a collection of volunteers and starting a new initiative in a community in the same niche. Your blog provided us valuable information to work on. You have done a outstanding job!
I’ve been exploring for a little for any high quality articles or blog posts on this sort of area . Exploring in Yahoo I at last stumbled upon this website. Reading this info So i’m happy to convey that I’ve an incredibly good uncanny feeling I discovered exactly what I needed. I most certainly will make certain to do not forget this web site and give it a look regularly.
Saved as a favorite, I really like your blog!
Have you ever thought about publishing an ebook or guest authoring on other sites? I have a blog based upon on the same topics you discuss and would really like to have you share some stories/information. I know my visitors would value your work. If you’re even remotely interested, feel free to shoot me an email.
I tried to send you an email but the Elsheimer81021@gmail.com did not work. Anna
Enjoyed looking through this, very good stuff, regards.
excellent post, very informative. I wonder why the other specialists of this sector do not notice this. You should continue your writing. I’m sure, you have a huge readers’ base already!
Enjoyed studying this, very good stuff, appreciate it.
Glad to be one of several visitants on this amazing internet site : D.
I really appreciate this post. I’ve been looking everywhere for this! Thank goodness I found it on Bing. You’ve made my day! Thx again
you have a great blog here! would you like to make some invite posts on my blog?
You got a very superb website, Gladiola I noticed it through yahoo.
Someone essentially assist to make severely posts I might state. That is the very first time I frequented your web page and up to now? I amazed with the research you made to create this actual post extraordinary. Wonderful activity!
You are my inhalation, I have few blogs and infrequently run out from brand :). “Analyzing humor is like dissecting a frog. Few people are interested and the frog dies of it.” by E. B. White.
Pretty great post. I just stumbled upon your blog and wanted to mention that I’ve truly enjoyed surfing around your blog posts. After all I will be subscribing to your rss feed and I am hoping you write again soon!
You are my breathing in, I own few blogs and very sporadically run out from brand :). “To die for a religion is easier than to live it absolutely.” by Jorge Luis Borges.
I am no longer certain the place you’re getting your information, but good topic. I must spend a while learning much more or understanding more. Thank you for great information I was in search of this info for my mission.
You could definitely see your enthusiasm in the work you write. The arena hopes for even more passionate writers such as you who aren’t afraid to mention how they believe. At all times go after your heart. “The point of quotations is that one can use another’s words to be insulting.” by Amanda Cross.
I think this website holds very excellent indited content material posts.
I will immediately seize your rss feed as I can not find your e-mail subscription hyperlink or newsletter service. Do you have any? Please permit me realize so that I may just subscribe. Thanks.
It is in point of fact a great and useful piece of info. I am satisfied that you simply shared this useful info with us. Please keep us informed like this. Thanks for sharing.
I really pleased to find this web site on bing, just what I was searching for : D also saved to favorites.
You actually make it seem so easy with your presentation but I find this matter to be really something which I think I would never understand. It seems too complex and extremely broad for me. I’m looking forward for your next post, I will try to get the hang of it!
I think this website has some very superb info for everyone :D.
hi!,I like your writing very much! share we communicate more about your article on AOL? I require an expert on this area to solve my problem. May be that’s you! Looking forward to see you.
It’s really a great and helpful piece of info. I’m satisfied that you shared this useful info with us. Please stay us up to date like this. Thank you for sharing.
Very interesting info !Perfect just what I was searching for! “All the really good ideas I ever had came to me while I was milking a cow.” by Grant Wood.
Wonderful goods from you, man. I have be mindful your stuff prior to and you’re just too wonderful. I really like what you have bought here, really like what you are saying and the best way wherein you assert it. You’re making it enjoyable and you continue to take care of to keep it sensible. I cant wait to read much more from you. This is really a terrific web site.
I like what you guys are up too. Such smart work and reporting! Carry on the superb works guys I have incorporated you guys to my blogroll. I think it will improve the value of my web site 🙂
Great post, you have pointed out some excellent details , I besides conceive this s a very fantastic website.
You are my aspiration, I have few web logs and sometimes run out from brand :). “Actions lie louder than words.” by Carolyn Wells.
I like this website very much so much fantastic info .
I would like to thank you for the efforts you have put in writing this site. I am hoping the same high-grade blog post from you in the upcoming as well. In fact your creative writing skills has inspired me to get my own website now. Actually the blogging is spreading its wings rapidly. Your write up is a good example of it.
An interesting discussion is worth comment. I think that you should write more on this topic, it might not be a taboo subject but generally people are not enough to speak on such topics. To the next. Cheers
Good post. I be taught something more difficult on different blogs everyday. It’ll all the time be stimulating to read content from other writers and follow a bit something from their store. I’d prefer to make use of some with the content on my weblog whether or not you don’t mind. Natually I’ll provide you with a hyperlink in your net blog. Thanks for sharing.
Hello. splendid job. I did not anticipate this. This is a splendid story. Thanks!
You are my intake, I have few web logs and occasionally run out from to post : (.
Thank you for any other wonderful article. The place else may just anybody get that kind of info in such a perfect manner of writing? I have a presentation subsequent week, and I’m on the search for such information.
This is the right blog for anyone who wants to find out about this topic. You realize so much its almost hard to argue with you (not that I actually would want…HaHa). You definitely put a new spin on a topic thats been written about for years. Great stuff, just great!
I’m impressed, I must say. Actually not often do I encounter a blog that’s both educative and entertaining, and let me tell you, you’ve got hit the nail on the head. Your thought is excellent; the issue is one thing that not enough individuals are speaking intelligently about. I’m very blissful that I stumbled across this in my seek for one thing referring to this.
There are definitely lots of details like that to take into consideration. That is a nice level to carry up. I supply the thoughts above as general inspiration but clearly there are questions like the one you convey up the place a very powerful factor will likely be working in sincere good faith. I don?t know if finest practices have emerged round things like that, but I’m sure that your job is clearly identified as a fair game. Each girls and boys really feel the influence of just a moment’s pleasure, for the remainder of their lives.
I like this website because so much utile stuff on here :D.
My brother suggested I might like this blog. He was entirely right. This post actually made my day. You cann’t imagine simply how much time I had spent for this info! Thanks!
I do believe all the concepts you have introduced on your post. They’re really convincing and will definitely work. Still, the posts are very quick for novices. May you please extend them a little from subsequent time? Thanks for the post.
I discovered your blog site on google and check a few of your early posts. Continue to keep up the very good operate. I just additional up your RSS feed to my MSN News Reader. Seeking forward to reading more from you later on!…
Some genuinely interesting points you have written.Aided me a lot, just what I was looking for :D.
Hola! I’ve been reading your site for some time now and finally got the courage to go ahead and give you a shout out from Huffman Tx! Just wanted to tell you keep up the fantastic job!
I am always browsing online for articles that can facilitate me. Thx!
Hey very cool blog!! Man .. Excellent .. Amazing .. I will bookmark your web site and take the feeds also…I’m happy to find numerous useful info here in the post, we need develop more techniques in this regard, thanks for sharing. . . . . .
I always was interested in this subject and still am, thanks for putting up.
Perfectly written content, Really enjoyed reading.
I really like your writing style, superb info, thank you for putting up :D. “God save me from my friends. I can protect myself from my enemies.” by Claude Louis Hector de Villars.
Hello my family member! I want to say that this post is amazing, nice written and come with almost all important infos. I’d like to peer more posts like this.
Hey there! This is my first visit to your blog! We are a collection of volunteers and starting a new initiative in a community in the same niche. Your blog provided us useful information to work on. You have done a extraordinary job!
Thanks a lot for sharing this with all folks you actually understand what you are speaking approximately! Bookmarked. Please also discuss with my website =). We could have a hyperlink trade agreement between us!
I have been examinating out many of your posts and i must say pretty good stuff. I will make sure to bookmark your website.
Just a smiling visitant here to share the love (:, btw great design.
Wohh precisely what I was looking for, thanks for putting up.
great post, very informative. I wonder why the other experts of this sector don’t notice this. You should continue your writing. I’m confident, you’ve a huge readers’ base already!
I’d incessantly want to be update on new articles on this internet site, bookmarked! .
Thanks for every one of your hard work on this blog. My mum take interest in setting aside time for research and it is easy to see why. My spouse and i notice all of the dynamic mode you give worthwhile information via this web site and as well attract participation from the others about this topic while our favorite simple princess is really discovering so much. Take pleasure in the rest of the new year. You are always carrying out a brilliant job.
I think this site holds some rattling excellent information for everyone : D.
But a smiling visitor here to share the love (:, btw outstanding design. “Everything should be made as simple as possible, but not one bit simpler.” by Albert Einstein.
Very efficiently written information. It will be beneficial to anyone who usess it, as well as myself. Keep up the good work – looking forward to more posts.